Wednesday, December 26, 2018

spring2-jndi-datasource-conexion

I share example, Spring Boot2 jndi datasource conexion from Tomcat.

Technologies used:

1. Spring Boot 2.0.3.RELEASE
2. Maven 4
3. Java 9
4. Eclipse: Oxygen.1.a Release (4.7.1a)
5. Tomcat 9
6. MySql 5.7.24

Code on GitHub:

https://github.com/HenryXiloj/Spring-boot2-jndi-datasource-conexion


Steps:

1. Create table and insert on table.

CREATE TABLE `user` (
  `id` bigint(20) NOT NULL,
  `name` varchar(45) DEFAULT NULL,
  `email` varchar(45) DEFAULT NULL,
  PRIMARY KEY (`id`)
) ENGINE=InnoDB DEFAULT CHARSET=latin1;

INSERT INTO `user` (`id`, `name`, `email`) VALUES ('1', 'Henry', 'test@gmail.com');
INSERT INTO `user` (`id`, `name`, `email`) VALUES ('2', 'Lucas', 'test2@gmail.com');

2.  Add in your context.xml (path_your_tomcat9/conf/context.xml).
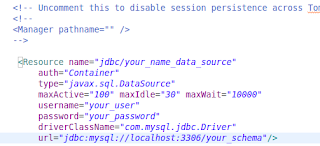


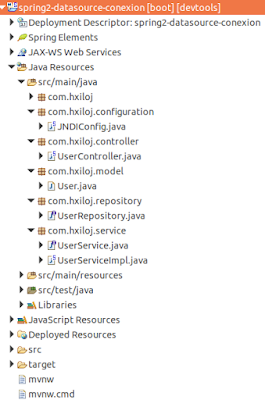
3. Import maven project from eclipse.

4. edit configuration file application.properties


5. Run  As -> Run on Server


6. Test: http://localhost:8080/spring2-datasource-conexion/user


References:

https://www.baeldung.com/spring-persistence-jpa-jndi-datasource


Monday, December 10, 2018

Spring-boot2-pool-conexion

I share example, Spring Boot2 pool conexion from Tomcat.

Technologies used:

1. Spring Boot 2.0.3.RELEASE
2. Maven 4
3. Java 9
4. Eclipse: Oxygen.1.a Release (4.7.1a)
5. Tomcat 9
6. MySql 5.7.24


Steps:

1. Create table and insert on table.

CREATE TABLE `user` (
  `id` bigint(20) NOT NULL,
  `name` varchar(45) DEFAULT NULL,
  `email` varchar(45) DEFAULT NULL,
  PRIMARY KEY (`id`)
) ENGINE=InnoDB DEFAULT CHARSET=latin1;

INSERT INTO `user` (`id`, `name`, `email`) VALUES ('1', 'Henry', 'test@gmail.com');
INSERT INTO `user` (`id`, `name`, `email`) VALUES ('2', 'Juan', 'test2@gmail.com');


2. Import maven project from eclipse.
3. edit configuration file .yml


4. Run  As -> Run on Server

5. For test: http://localhost:8080/spring2-pool-conexion/user


Code on GitHub:
https://github.com/HenryXiloj/Spring-boot2-pool-conexion

References:

https://www.concretepage.com/spring-boot/spring-boot-tomcat-connection-pool


Friday, December 7, 2018

ERROR 1698 (28000): Access denied for user 'root'@'localhost'

I share solution the next error: ERROR 1698 (28000): Access denied for user 'root'@'localhost'

1. When you create new install mysql use 'sudo' on ubuntu.

2. First connect you db from command line.


sudo mysql -u root

3.


SELECT User, Host, plugin from mysql.user;

if you check User 'root' have 'auth_sockect' update to 'mysql_native_password'

4. in your case User='root'


5. FLUSH PRIVILEGES;
6. exit;

Try again.


References:

https://stackoverflow.com/questions/39281594/error-1698-28000-access-denied-for-user-rootlocalhost

Thursday, December 6, 2018

Example consuming Gmail API

I share basic example, how to integrate Gmail API with Gradle

Technologies used:

1. Spring Tools Suite
4. Gradle 3.4.1
5. Java 8
8. Eclipse: Oxygen.1.a Release (4.7.1a)

Code on GitHub: https://github.com/HenryXiloj/api-gmail

Steps:

1:

Create credentials:


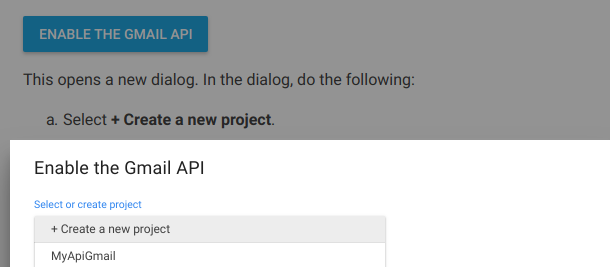
- if you have account on devolepers google, just on click dialgog ENABLE THE GMAIL API and create new proyect or choose exist proyect. from there page I get code for this example, below left the link on references.

- Dowload the configuration file and check the name file is credentials.json

2:

-create folder
mkdir your_proyect
cd your_proyect
-- run next command
gradle init --type basic
mkdir -p src/main/java src/main/resource
--Copy the credentials.json into src/main/resource


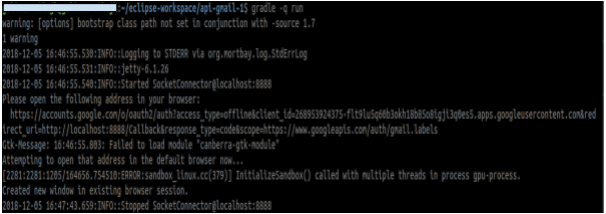
3: run your proyect with next command.


gradle -q run
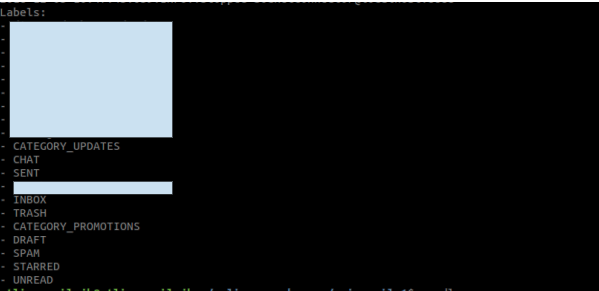
Check de images when you run the project:


Result get my labels from my gmail.


References:

https://developers.google.com/gmail/api/quickstart/java


Wednesday, December 5, 2018

Manually Install Java on Ubuntu 18.04.1

How to manually install Java on Ubuntu:

Check next steps:

Step 1:

Download JDK from Oracle page, Link

https://www.oracle.com/technetwork/java/javase/downloads/java-archive-javase9-3934878.html

Step 2:

For example I'm install JDK 9, but others version is similar.

Choose  file --> .tar.gz


Step 3:

Extract file on next path.

/usr/lib/jvm

Step 4:

Run next comands:

sudo update-alternatives --install /usr/bin/java java /usr/lib/jvm/YOUR_JDK/bin/java 0
sudo update-alternatives --install /usr/bin/javac javac /usr/lib/jvm/YOUR_JDK/bin/javac 0
sudo update-alternatives --install /usr/bin/javaws javaws /usr/lib/jvm/YOUR_JDK/bin/javaws 0

Step 5: Configuration, Choose your version java, javac and javaws.

sudo update-alternatives --config java
sudo update-alternatives --config javac
sudo update-alternatives --config javaws

Check the image, below:


Deploying a Spring Boot Application with Cloud SQL and Cloud Run on GCP

In this post, we'll explore how to provision Cloud SQL instances with different connectivity options using Terraform and then access the...